Pinterest: How to fix banned, broken and spammy pins

Have you ever clicked on a Pinterest link only to discover it's been banned? Don't worry, there is an easy way to fix that banned, broken or spammy link.If you're a pinner, then you've probably had this experience. If not, you've been lucky. Because at some point, this is going to happen to you, too. It's becoming a big problem on Pinterest--just like it is on the whole rest of the Internet.

You've got a board full of cool pins. Crafting pins, let's say. And now you have some extra pocket money and a free morning to spend at the craft store. It's time to sit down with your pins and decide on something to make.

Oo! There's that really cool little up-cycled eyeglass case turned sewing kit you pinned just last week. You click on the photo and navigate to the website in search of the step-by-step instructions and a list of materials. 

At least, you think that's what you're doing. Instead, you get this:


Yes, it's the dreaded blocked pin. This is what you see when you clink on a spammy link on Pinterest. Usually, you will only see this message when you're particularly excited about making whatever the thing was that you pinned.

Why does this happen? Well, spammers long ago figured out that they can hijack perfectly useful pins by simply replacing the original link's URL with their own. So they steal someone else's photo of a really cool looking craft or a yummy recipe, they attach their own spammy link to it and then they count on a lot of people pinning it without first checking out the link. That way, the link gets propagated all over Pinterest, and when all of us innocent pinners finally get around to checking it out it either goes somewhere horrifying or we get the above error message.

Now, when you have this experience you probably just grieve a little and then move on to something else, thinking that pin is lost to your forever. Well, I've got good news--in most cases you can figure out where that link ought to take you.

Fortunately for all of us, spammers are neither smart enough nor talented enough to create their own enticing images to attach to their crappy links, so they almost always steal the images from perfectly legitimate websites. And that means with a little sleuthing, you can pretty easily fix your pin so it goes to the right place. Here's how:

So this is the pin I had on one of my boards that turned up the above error message:

Doesn't that look yummy? That's what I thought, too. So I was kind of bummed when it turned out to be a spammy link. But alas! All I had to do to find the actual source of this image was this:

Right click on the image and "save as." Put it somewhere on your hard drive where you'll be able to easily find it.

Now go to Google Images at images.google.com. Click on the little camera icon in the search box.

Now choose "upload an image, " then click "browse."

Almost done. Navigate to wherever you saved that original image, and follow the on-screen instructions to upload it. Here's what you'll get:

There will probably be a few potential hits in your search results, and not all of them will be correct. But if this image exists somewhere else on the internet Google should be able to find it. In this case, the correct link was the second one in the search results.

Now all that's left to do is re-pin, and then delete that old pin from your board so that other pinners will have the correct link. If you only ever pin stuff you find on Pinterest, here's a short explanation of how to pin from a website:

Lots of websites and blogs already have a little "Pin it" icon. Just click on that. If they don't (I couldn't find one on this particular blog), you can use your browser's "pin it" button (you have to download and install it--Pinterest has a help page that will tell you how). Click on that button and follow the on-screen instructions to pin the correct link.

Then go back to that spammy pin and click on that little pencil icon in the top right corner:


Now click on "delete pin" in the bottom left corner. Done!

Don't neglect that last couple of critical steps! It is important that we purge all those spammy links from our beloved Pinterest. Think of it like picking up litter from the street--you're just making Pinterest a more beautiful place. And isn't that what we all want?

Halloween Advent Calendar

My kids bug me everyday with this question:

"Mom! How many more days until Halloween?"

You know, kids, that's just way too much math. But yes, my kids look forward to Halloween almost as much as they look forward to Christmas. Maybe even more. And we have a Christmas advent calendar, so ....

I decided to make them a Halloween one, based on a Christmas advent calendar tutorial I found on Pinterest. I know, so much for that whole "crafting my library" thing. I'm thinking of changing my tagline to "crafting my pins, 10 minutes at a time ..."

I spent literally a couple of hours on this calendar, and I think it turned out really cute:

What I love most about it is that it uses dollar store supplies. The cookie sheet came from The Dollar Store and so did the flat-backed glass marbles. Then all I had to buy was some Halloween scrapbooking paper and magnets. I already had some Mod Podge.

The steps are simple:

  1. Cut the numbers out of your scrapbook paper and paste each one onto a black square. Tack the numbers to the cookie sheet (I used two Halloween designs on either end of the calendar to make the numbers even out).
  2. Mod Podge over the whole thing. I used two coats.
  3. Meanwhile, cut little Halloween characters/phrases/scenes out of the scrapbook paper. For this part you'd obviously want to choose paper that has pictures on it about the size of the glass marbles. 
  4. Mod Podge the cutouts to the back of the marbles, then let dry.
  5. Glue the magnets to the back of the marbles. I just used Tacky Glue for this.
  6. Drill holes at the top of the cookie sheet so you can hang it up. Done!
Now my kids don't have to ask me half a million times a day to figure out how many days there are until Candy Overload. They can just go count. And no, I don't ever remember what the answer was from the day before, so it's not like it's just a matter of simple subtraction. :P

What's in my knitting bag?

One of my favorite craftsy blogs (http://www.luvinthemommyhood.com/) recently posed a question that I felt compelled to answer:

What's in your knitting bag?

Hmm, good question. I haven't looked in there in a couple of months. So I dumped it out and here's what I found. (I was going to take a photo, but read on and you'll know why.)

  • One case for interchangable knitting needles
  • A piece of cardboard shaped like my foot (for making socks)
  • A case containing three sets of circular needles
  • A pattern book for making bags
  • One finished knitted bag
  • One unfinished knitted bag and 7 small balls of yarn to go with it
  • One skein of green yarn
  • One "knit-chek"
  • One set of #7 double pointed needles
  • A reusable grocery bag
  • Half a set of #10 double pointed needles
  • One blue colored pencil
  • One #10 straight needle (where the heck is the other one?)
  • A tube of Blistex
  • Two M&Ms
  • One skittle (I'm pretty sure my kids were responsible for the candy, because I would never willfully leave uneaten chocolate anywhere, least of all my knitting bag)
  • One black gel pen
  • One purple paint marker
  • A note with a phone number on it
  • One spool of black quilting thread
  • A skein of fun fur
  • One stitch holder
  • Several yarn labels
  • A quilt block template
  • A scrapbooking tag my six year old wrote her name on
  • A small battery powered light
  • A magnet from Real Simple with a bunch of advice about storing produce
  • A small screwdriver
  • A hair tie
  • One piece of pink Lego
Conclusion? I need to clean out my bag.

At last ... Henry's Dinosaur Quilt!

At last, at last, I finally finished Henry's dinosaur quilt. I actually did the quilting ages ago but it's such an enormous thing that I procrastinated the heck out of finishing the binding. Poor kid was always asking me when he could have his quilt.

Once again I had a hard time coming up with a decent photo so I just did the old stand-by folded quilt picture. Here it is:


This one is sort of OK, if you'll excuse my ugly brown carpet:


This is by far the biggest quilt I've ever made, in fact it very nearly covers my queen mattress though it stops just short of being a true queen size. It's really more of an oversized full. And I quilted the whole thing on my short-necked little Brother! Honestly though I don't think I'd ever try to make a quilt this size again, not until I get a machine with a longer neck. This was easy quilting--just straight up and down lines; I can't imagine trying to free-motion something this size.

Anyway yay, done. On to the next project ...

I fudged a pattern

A couple of months ago one of the websites I sometimes get stuff from (I can't even remember which one now) had this great deal on a little bag kit. It was ridiculously cheap, like less than 10 bucks though I also can't remember the exact amount. Anyway I ordered it and then discovered why it was so cheap--because it was a kit without a pattern. If I wanted the pattern, I would have to order it for another $8. And of course it couldn't be downloaded, either, I'd have to order a paper copy.

So anyway, I shelved it and then got it out a couple of weeks ago and wondered if I could figure out how to make the bag from the picture on the front of the kit. Now, that's something I've never done before because I kind of suck at doing stuff like that. But I didn't want to buy the pattern, either. Not because I'm cheap but because I felt like I'd been a little cheated. In my defense, I would have paid extra to get the pattern with the bag if I'd known in advance that the pattern wasn't included. I would have even paid extra to download it. But getting a paper copy seemed like too much trouble for a <$10 bag.

So I mangled it together and it actually looks pretty good. The only thing I didn't really do right is sew on the stupid handle, because I couldn't figure out how to do that with the zipper complicating everything. That's way, way too much geometry for me.

Here's how it looks, not bad for an amateur eh?


My Old 15

Guess what, I've taken on a new project!

Yes, that's right. Because I have so much extra time in my life for all this stuff, haha.

Anyway I was at my neighbor's place last week when he opened his garage to reveal this gorgeous albeit neglected thing sitting there all covered with dust:


"Wow!" I said. "That is a cool old sewing machine!"

"Actually I've been looking for a new home for it," he said. "You want it?"

Heck yeah I wanted it. And now it's sitting in my garage, just waiting for me to start work restoring it. Except of course I really have no idea how. My dream, though, is to fix it up and use it to make a quilt to give to my wonderful neighbor in thanks for such an awesome gift.

With the help of some of the great people on the QuiltingBoard, I was finally able to identify this machine as an early model 15, manufactured in Germany. Sadly that's about all the info I can get about it, because the factory in Germany (and all its records) were destroyed by the Russian army during World War II. So cool as this machine is, I'm afraid many of its details will remain a mystery.

Do you know how to restore an old sewing machine? I'd love some tips!

Creative Memories goes up in a cloud of smoke

Warning: Rant.

Many years ago, before kids, I scrapbooked. My MO was like this: I would go down to the scrapbooking store and spend hours leafing through all the different papers and embellishments and stickers and I would spend a bunch of money and then go home and spend three or four hours making one two-page spread. How I got anything done at all is beyond me. I guess you have a lot of extra time when you don't have kids.

I used post-bound albums, which I hated. They were fiddly and the pages always buckled instead of lying flat. I considered D-ring albums, but two-page spreads looked awful in those albums because of the huge gap between them. I figured I was just stuck with post-bound.

Anyway then I moved here to Rough and Ready and learned that one of my neighbors was a Creative Memories consultant. And she hosted weekly crops! Which was awesome for me because it meant new friends and some me-time and that I would always have one morning carved out every week for scrapbooking.

At first, I didn't love Creative Memories. I liked the fancy papers and Creative Memories had no fancy papers. You just stuck your pictures right on the page, maybe after rounding the corners or something, and then you put a few stickers on and a fancy border. I thought the pages were kind of boring. But I really liked the strap-hinge albums. They always lay flat and there was no gap between the pages. And I really liked getting together with friends and neighbors to crop.

Then Creative Memories did come out with the fancy papers, and all the stickers and ribbon and paper flowers to go with it. And the best part about it: all the stuff matched. No more scouring the scrapbooking store in search of papers, or spending hours trying to decide how to make a page look nice. It was all right there in that one package.

Now I didn't just love the albums, I loved everything about Creative Memories. I became a consultant, though I rarely ever sold any of the Creative Memories products. I just bought the stuff for myself. After that I almost never went to one of those scrapbooking stores. I was happy on my little Creative Memories cloud.

Now if you are also a Creative Memories fan, you know where I'm going with this. A few weeks ago, my beloved Creative Memories stabbed me in the heart, with the same very long knife they used to stab all their fans in the heart. Creative Memories will no longer be making albums, pages, page protectors or really anything good. Instead they will be focusing on their digital line, which I have little or no interest in (on the rare occasions that I do make photo books I use Snapfish or Shutterfly and then only during one of their very discounted promotions). They will also still be making their "Fast to Fabulous" albums, which I also have no interest in. I don't want my book dictating how many photos I get to put in my album, or how many per page or what orientation they should be, and I also really don't want my books to look exactly like everyone else's books.

And then to add insult to injury, we'll only be able to buy pages and protectors until the end of this month. Why does this suck? Because every time Creative Memories came out with a coverset I liked, I would by it, but I wouldn't buy the pages and protectors to go along with it. Because the coversets were always "while supplies last," but the pages and protectors were forever.

Or so I thought.

I have 14 empty Creative Memories albums on my shelf. I like to put about 35 pages in each book, which is about two packs and 1/3. That's about 33 packs of pages and 33 packs of protectors. I'm going to have to max out a credit card to afford to complete all those albums. But if I don't, all those albums become useless. I could sell them on eBay, but I love the strap hinge format and selling those albums means that's one more post-bound album I have to buy instead. I really want to use all my CM albums because I love them.

What could Creative Memories have done differently? I don't know. Some people think they never should have started making the fancy papers, because that's what did them in. But though I would have still used their albums I doubt I would have become so devoted to them if they didn't have those papers. Maybe I'm unusual though.

And I don't know what the courts are making them do--because this is all bankruptcy related--but I think giving us three or four months to order those pages instead of less than a month would have been a kindness. Personally, I can't afford Creative Memories' bankruptcy. :(

Now I know that this is about the collapse of a company and not really about those of us who were once devoted to that company. But Creative Memories needs to give us a parting gesture of thanks from the deck of their sinking ship. Because we all loved them, supported them, told all our friends about them, and spent probably too much money on their products. The least they could do is sell their patent on those albums to some other company. Because I've been searching the web for a comparable, widely available (in many colors) strap-hinge album and I'm not finding much. And I really don't want to go back to post-bound.

I'm here ... really!

Ah, I know. I am in danger of becoming one of those blogs where the entries get further and further apart, and each time the blogger pops in and makes excuses about how busy she's been, and swears she will post more, and then she eventually disappears altogether. I am still over on my other blog regularly (Travel by Stove) and if you're in the Grass Valley area I have another fun blog called GVFamilyFun. So I swear I'm not totally absent, I've just been neglecting this poor blog though I have actually been doing some crafting.

Here are my works in progress:

Henry's dinosaur quilt is almost finished. I just have to sew on the binding and patch a seam-ripper-inflicted hole.

I waited for several months for my husband to make me a quilt frame, and then I threw up my hands and made one myself. It's smaller than the one on the website, which is fine because my living room is barely big enough for it as it is, and I doubt I'll ever be trying to quilt a king-sized quilt on my little Brother sewing machine. I did baste one quilt on it, which I made from a pattern in this book:

But the jury is still out whether it's going to solve my tuck problems.

Speaking of that quilt, I'm trying to FMQ it and it looks hideous. :(

I am also crocheting something (imagine that!) I really need a nice sun hat and a few years ago I saw one at a little shop in Lake Tahoe that I still regret not buying. It was crocheted and it was really cute. I don't think this one is going to be even remotely as cute, but I had to try. Here's the pattern.

And I'm still working on a scarf from this book:

But that one is going to take months. Because, let's face it, it's 100 degrees outside. Plus I only ever work on it while I'm at Natalie's swim lesson. I guess I'm about halfway finished.

What are you working on? Send links!

I'm making one of these

Henry's quilt top is HUGE. I don't know why I thought I was making a twin sized quilt, it's really more like a full.

Of course that's not huge by most people's standards, but it's huge by the standards of a Brother CS6000i sewing machine, which has a ridiculously short neck. I had trouble doing twin quilts on this machine; I don't know how I'm going to get a full through it.

This is what made me decide that I need some alternate method of basting. I've tried taping quilts to my kitchen floor and pin basting, but the tape never sticks and I just end up frustrated. I've tried spray basting them, but the spray basting never sticks either, and I just end up frustrated. So this time I tried Googling "fool-proof quilt basting" and I found instructions for making a basting frame.

The parts cost me around $45, which is really very cheap when you consider what something like this would cost ready-made. Of course I only got 8 foot boards for mine, because the 10 foot boards were $1 a foot while the 8 foot ones were only $1.30 total. Huge difference, and I figured I wasn't ever going to be using this thing for a king anyway, since I'm having trouble imagining even quilting a full on my little Brother.

So the original plan was to ask my husband to make this thing for me, but let's face it--I can't even get the guy to replace a smoke detector in a timely fashion. So unless I want my boards sitting in the garage gathering dust it looks like it's going to be my project. And I'm about as handy as a two year old, so it should be interesting.

Expedition Bag

My kids go to an expeditionary learning school, which (without going into too much detail) basically means that they go on a lot of field trips. Because I'm always looking after Henry I hardly ever get to chaperone on these trips, but when I do I am always annoyed to discover that I have to carry around this folder full of papers/instructions/emergency contact information etc. regardless of where we are or how long we're there. So last time I went on one of these trips I thought to myself, hmm, wouldn't it be nice to have a bag I could use to carry all that stuff around in?


VoilĂ ! Here's one I put together in a couple of hours. I could have done it a lot faster if I was better at sewing. I still think it's pretty cute though. The strap was way too long so I just folded it over and stitched it so there's a little shoulder pad on the strap instead of all that extra length. Here's the picture:

The pattern came from a book called "The New Handmade: Simple Sewing for Contemporary Style " by Cassie Barden. Of course, this is the second bag I've made out of this book, so it doesn't really fit the whole "crafting my library" thing since the idea is to make just one project from each book. But I really needed an expedition bag, so once again ...

The pattern is called "Reading List Tote" and it's on page 16. I did change the pattern so the bag is crossbody instead of a tote, since I need to be able to comfortably carry it for several hours at a time.

Anyway just so you know I haven't gotten lazy, I have actually been making stuff, just not posting about it. I finished Henry's quilt top today, too, which turned out to be a lot bigger than I thought it was going to be. I have no idea how I'm going to quilt it on my tiny little machine.

More later ...

More Party Invites

Yes, it's birthday party season, as you can tell because about three quarters of my posts are party invite related.

Just like I did with Dylan's invite, I kept Natalie's simple. She wanted a unicorn party so I threw this picture together in Photoshop, then I got some RSVP cards and just cut and pasted (in a literal sense). They came out pretty cute, but I think I prefer doing these invites with characters (like Harry Potter, Speed Racer, Captain Jack) because for some reason it makes me laugh to see my kids' faces pasted on famous people. :)

But you know, you give the birthday girl what she wants!

Still slogging away on that dinosaur quilt and hope to have some pictures to post in a couple of weeks.


Project the Next

I made Henry a quilt back when he was in a crib, but now that he's in a big-boy bed I owe him a new one. We had a talk about it and he decided he wants dinosaurs.

So in keeping with my theme, I chose a book from my library (one I've never made anything out of). Here it is:

This book is called Easy Quilt Projects: Favorites from the Editors of American Patchwork & Quilting. The pattern I chose is called "In the Meadow." It appears on page 11.

This pattern does indeed look easy, just as promised by the book's title (it's just squares and rectangles, without any borders). And I really need easy right now, after that nightmare-of-triangles chicken quilt.

I had a little bit of a tough time choosing fabric for this one, because I initially went to a fabric store that didn't actually have any dinosaur fabric. But you know, I can't walk out of a fabric store without any fabric, so I bought a bunch of greens thinking I'd find some dino fabric in green, for sure.

And I did, but the line also came in a blue, so then I went back and bought some blues. And then the ladies on the QuiltingBoard suggested adding some oranges and yellows so it wasn't just a lot of cool colors, so I bought more fabric and got rid of some of the other ones I was planning on using. So I bought way too much fabric. But hey, that's what my stash is for right?

Anyway here's my final palette:


 I'm going to cut and sew at least part of it on Friday, state of mind permitting. :)

Harry Potter Party Invites

Dylan is on a Harry Potter kick, so for his eighth birthday party we're doing a Harry Potter theme. Which means of course that I had to come up with a Harry Potter party invitation. Hello, Photoshop.

I love doing these, they always make me laugh.

For this invite I chose a poster from the Deathly Hallows, featuring the devastatingly handsome Neville Longbottom:


In case you aren't with me on the whole "devastatingly handsome" thing, you have seen him recently, right?


Yes, that's right. I thought so.

Anyway I got Dylan to pose for me, looking as Neville-Longbottomish as he could, and then I Photoshopped him into the poster:

And then I laughed for about 20 minutes.

Sans-blood, of course (this is second grade after all).

After I was done laughing, I changed the date from 7.15 to the date of the party, and on the inside I put "(Being a 7-year-old, I mean)" You know, as in "It all ends: being a 7-year-old." Which I thought was marginally funny though I'm not sure anyone else will get it.

Cute, though. Can't wait to send them out!

Chicken Quilt

OK, here it is: my chicken quilt. It turned out OK, if you don't look at the back.

The pattern came out of Farm Girl Quiltsand is called "Fields of Red Clover" (page 30). 

Just about everything that can go wrong with a quilt did go wrong with this quilt. First, I have no business messing with triangles. Seriously. I don't know how I managed to get my seams so wrong but after I was done sewing all of the triangles together those little keystone blocks were so much bigger than they were supposed to be that I had to trim them all to make everything fit. Same with the sashings. So this quilt is maybe 10 or 15% smaller than it's supposed to be.

Then, I noticed that some of my seams were coming apart. When I flipped the quilt top over I found loops on the back. How I didn't notice this while I was piecing is beyond me. Amateur. So I had to rip some of the seams out and sew them again.

Then after I sewed the border on I noticed that it wasn't even laying flat. This must be a symptom of the seams being so off, I don't know. So I had to take the borders off and retrim them to make the quilt lay sort of flat.

Then I bought fusible batting. Oh no, never again. It didn't lay flat out of the package and it didn't stick very well, so I ended up with tucks all over the back after I quilted it. Huge, terrible, awful, worst-ever tucks. Some of them I even ripped out so I could redo the quilting, because they were that bad.

But does it pass the "12 feet away from the back of a galloping horse" test? I think so. And I did manage to get a pretty cute photo of it anyway. The question remaining, of course, is if I ought to still give it to Monica given how many problems it has. Maybe I'll just promise to make her another one when, you know, I'm a little better at this. :)

Agitate Manually

I'm almost done with Monica's chicken quilt, which I'll post in another day or two. Really this is just about as close to a disaster as any quilt I've ever made, but I'll vent on that later.

I bought Heirloom Fusible Cotton Batting to use in it, because I thought "Ooo, no pinning." then when I got home I read the care instructions:

OK so I know quilts need special care, but seriously? Who is going to spend the time to "agitate manually" every time they need to wash a quilt? If someone gave me a quilt with those washing instructions, I would put it on a shelf. Occasionally, I would unfold it and look at it, but then I would fold it up again and put it back on the shelf. Quilts were made to be used, and that means they should be washed.

Also, I've never heard of "Orvus."

Also, I can't dry anything flat because my kids will walk all over it. Monica has dogs, so her problem is even greater than mine.

At least one person told me that these washing instructions are CYA, but I think I'll avoid fusible batting in the future (and quite possibly all batting from this particular company, if the washing instructions are similar). I need simplicity in my life. That means cold water, gentle cycle, tumble-dry low. I will even spring for Woolite. But I'm not going to stand over my machine for 15 minutes and "agitate manually." Give me a break.


Miss Andrea's Quilt

Dylan's wonderful former kindergarten teacher had a baby on Wednesday, beating her baby gift by five days. Ah! I really did try to get it done on time, but [excuse, excuse, excuse].

Happily, I did finish it and I think it's pretty cute. I based it on this pattern, which I pinned a couple of months ago. One thing comes immediately to mind, and that is that this quilt doesn't fit into my whole "quilting my library" tagline because Pinterest isn't exactly a part of my library. But I needed simple and cute, and digging through that stack of dusty books didn't exactly fit into my idea of "simple," though I'm sure I could have found something cute.

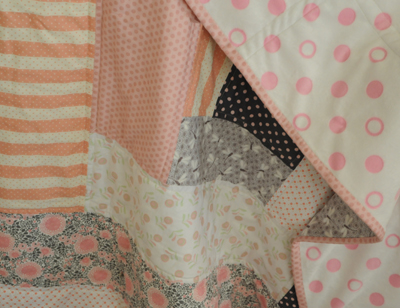
This one will do, though. Here's the finished quilt, which is basically just one very large log cabin block:


OK not completely finished, because I had to Photoshop out a bunch of threads and safety pins. Which brings one more thing to mind, I need to learn how to photograph quilts. This ain't no shot of a beautiful quilt tossed casually over a white wicker chair in someone's beautifully manicured back yard, none of which describes anything about my house. But you get the idea. Those pink polka dots on white are the backing, a really soft minky fabric. Cute and easy!

Angry Birds Party Invites

I don't like the first half of the year. I mean, I love it, but it's stressful. All four kids have birthdays in the first half of the year, starting with Henry. And I plan every birthday a month in advance, and I hand make all the invitations, and I stress until all the kids finally arrive on the big day.

Henry's birthday is this Sunday, so right now I'm in stress mode.

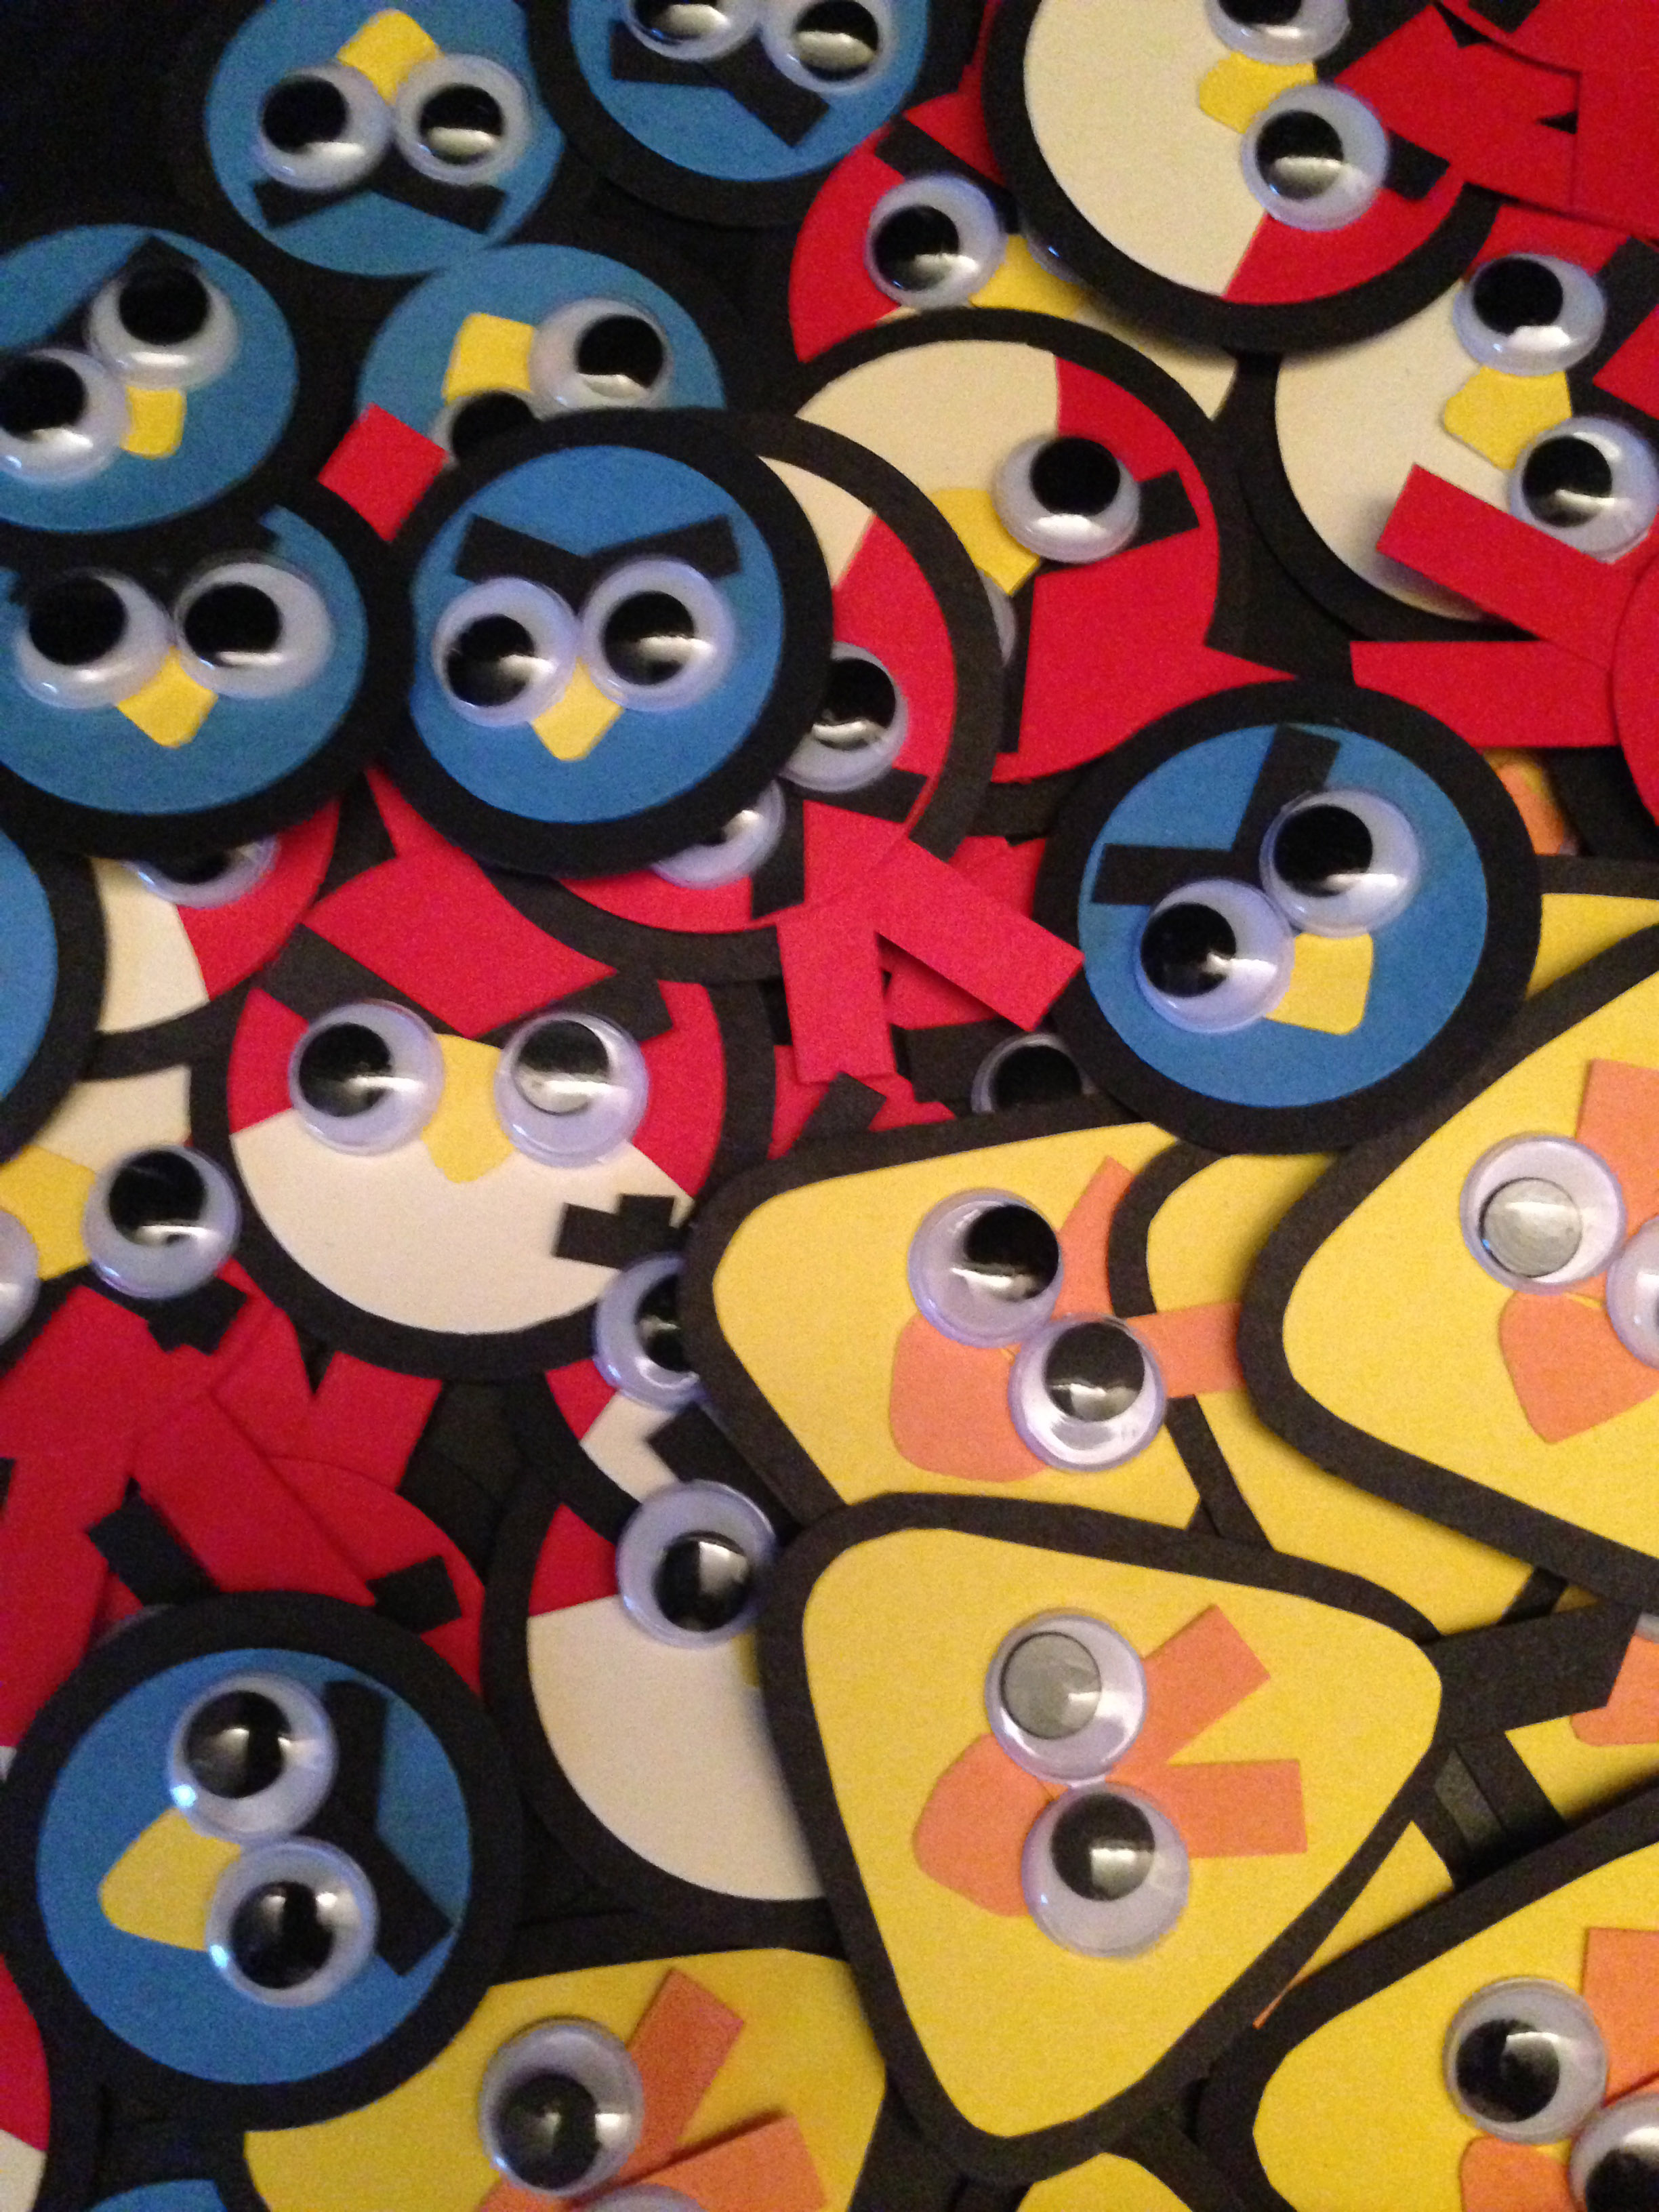
I do like making the invites, but they are work. This year I decided not to put too much creativity into Henry's invites, so I just found a cute template online and duplicated it, with a couple of tweaks. I thought I was saving myself time, because I only had 15 invites to make. Of course, that translated into 45 angry birds, each one with individually cut eyebrows and beaks. To give you an idea of how many angry birds we're talking about:

Yep, that's alotta angry birds.

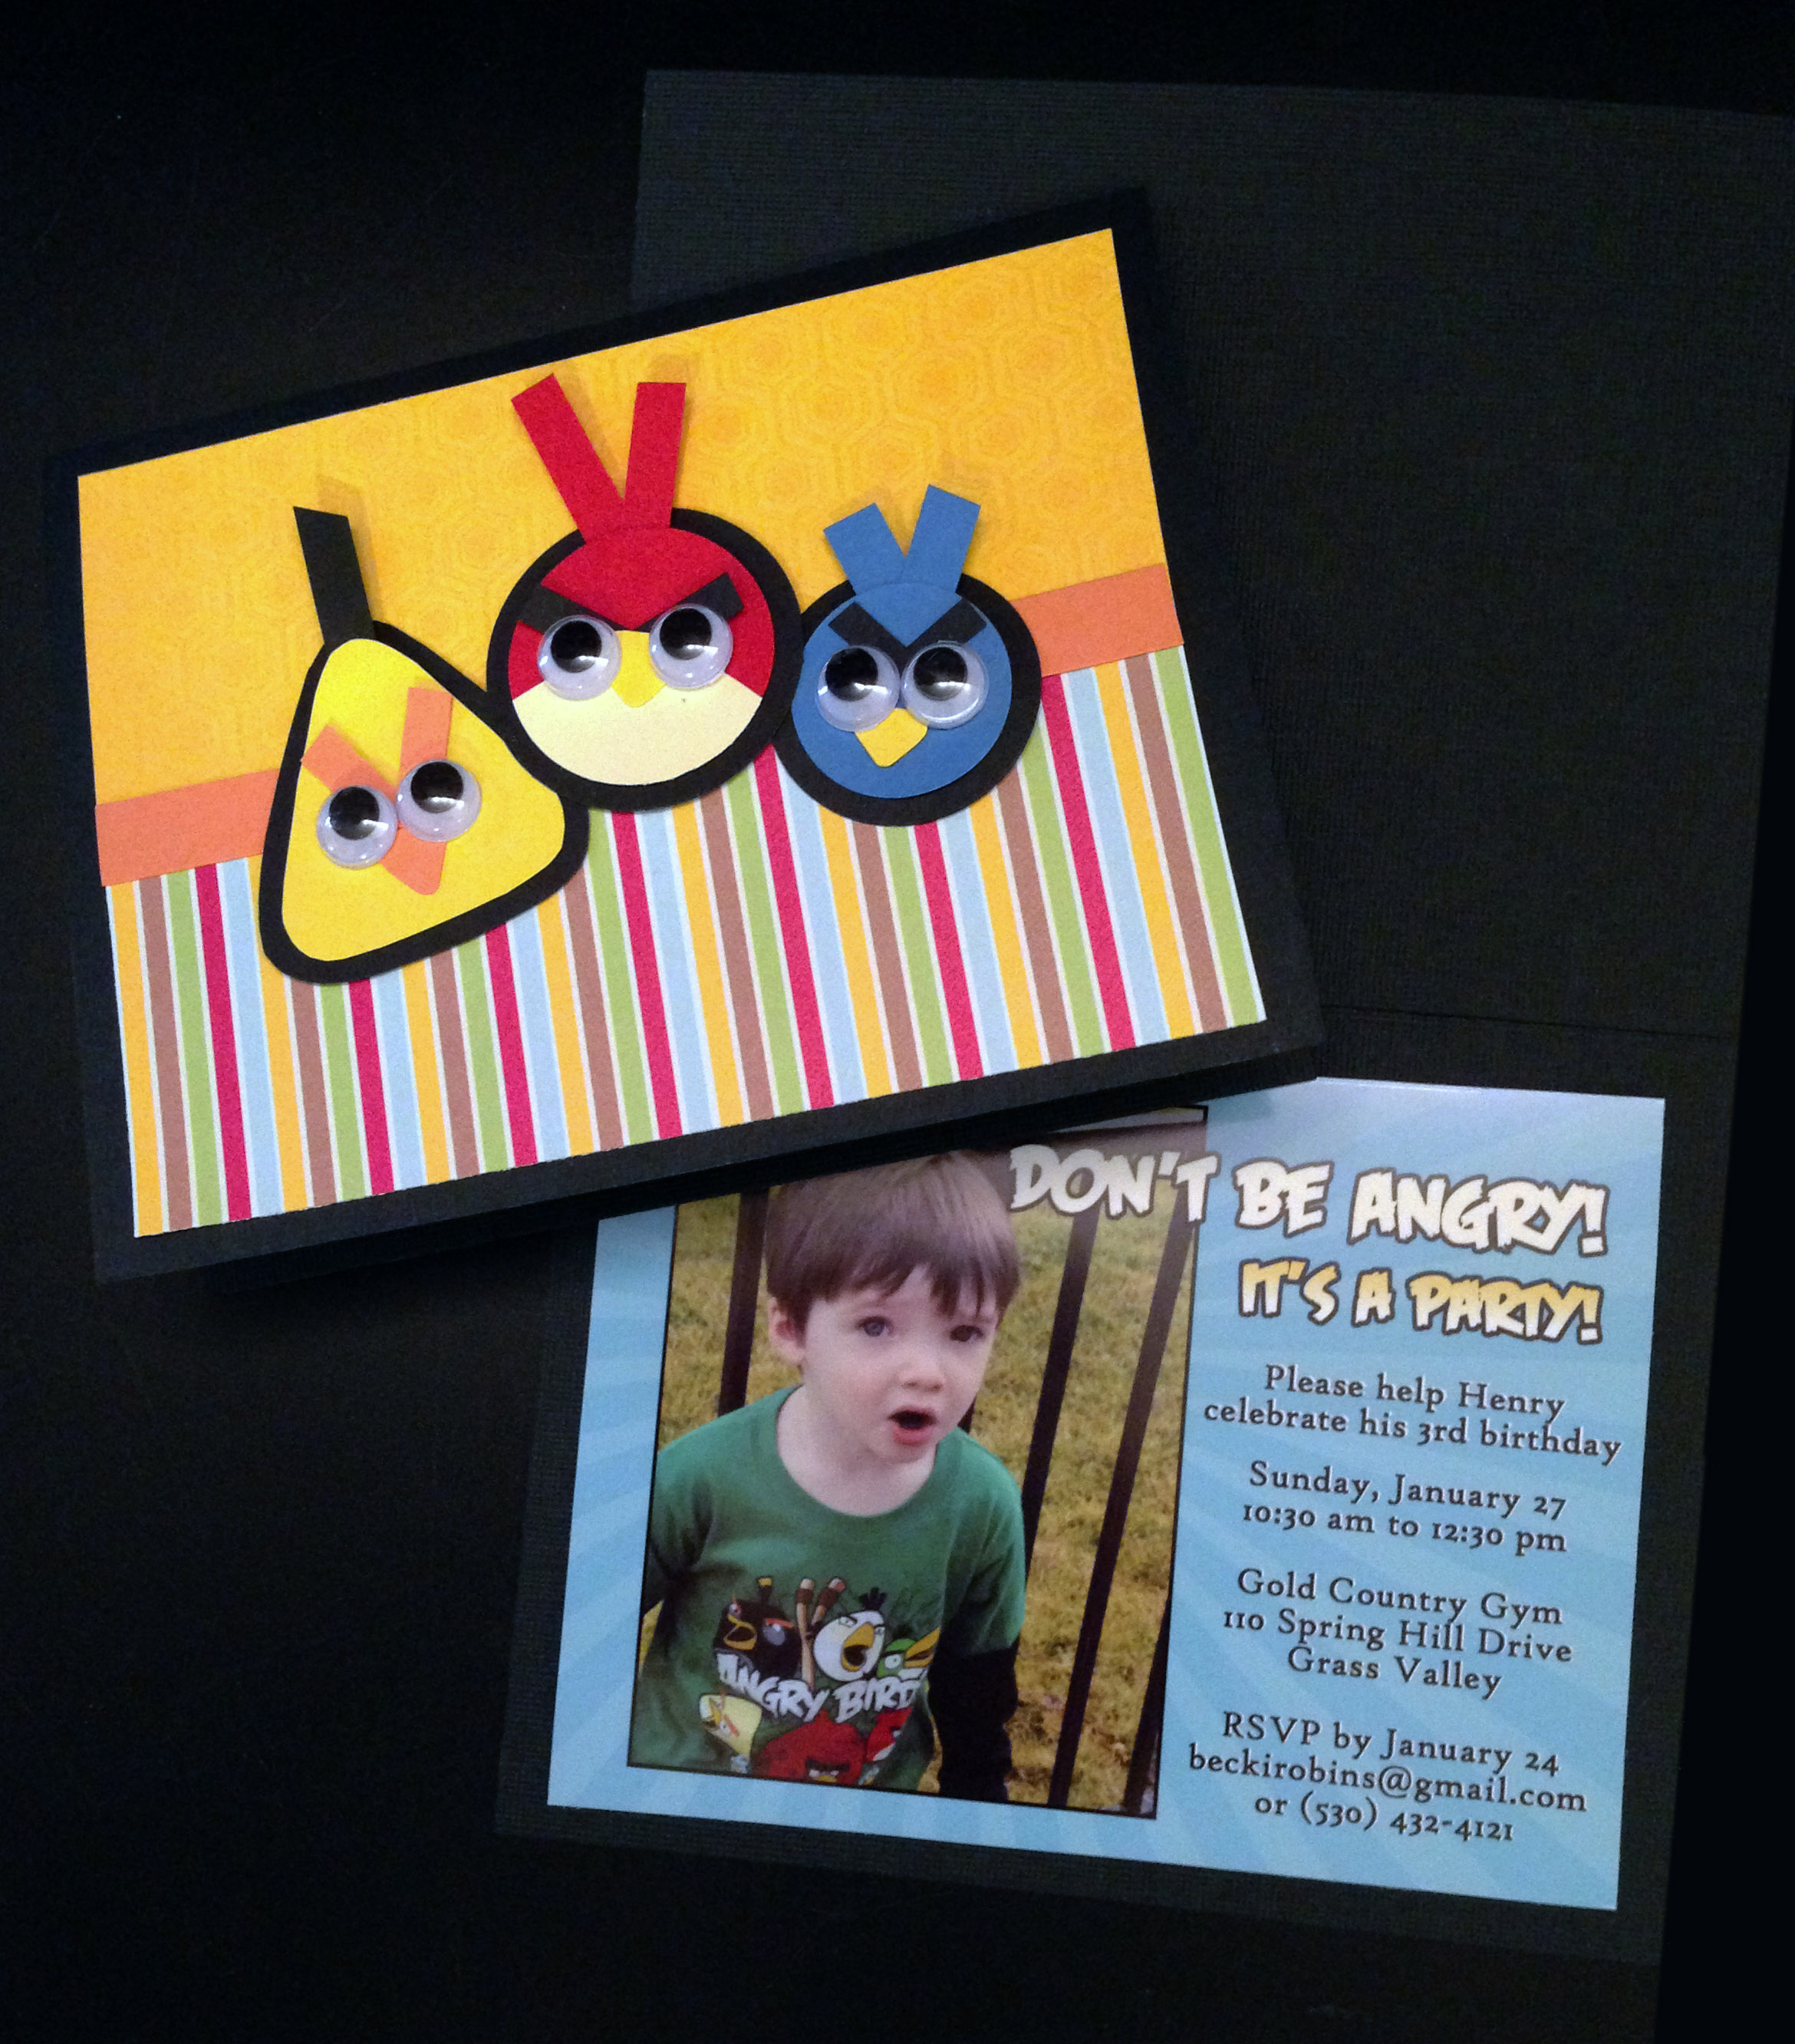
They came out cute though:


But next year, I'm just doing them all in Photoshop. Those look cute, too, without all the cutting.

Ten spare minutes is all I have

Because, I really needed another blog.

No, actually it's because I need some motivation. You see, a couple of years ago a vague remark made by my friend Monica convinced me that I should take up quilting. And a few years before that, another less-vague remark that Monica made convinced me that I should take up knitting. And before that I was a scrapbooker, and the only reason I have time for that is because of, um, Monica (who has workshops) and before that I was a photographer, which believe it or not has nothing to do with Monica. And other than four hours a week on a Tuesday I don't really have time for any of it.

But that didn't stop me from buying books on the subject(s), because that's what I do. I buy a ton of books and then they sit there on the shelf and I never use them, and I end up with a fabulous collection of quilting/knitting/scrapbooking/photography books that are covered with dust.

So that's why I called this blog "Ten Spare Minutes," because I'm lucky if I can can find that in any given day. And what I'd really like to do is make use of all those books. So, I am setting forth with the goal of completing one project from every one of my books, which believe me is no small task. Plus whatever else I get inspired to do, damn you Pinterest.

Travel by Stove (my other blog) keeps me really busy, because the meals I make for it are pretty involved and complicated, which makes for long, involved and complicated blog entries. So these posts are going to be short. Because the goal is to get me crafting, and long blog posts are only going to get in the way.
Copyright @ Ten Spare Minutes | Floral Day theme designed by SimplyWP | Bloggerized by GirlyBlogger | Distributed by Deluxe Templates